Just let me say, I love gardening! Not only is it a great pastime and stress re-leaver, but there are so many environmental and health benefits as well. It is so satisfying watching things grow and having the security of growing my own food. In addition, a great garden, whether it is a vegetable/fruit or flower garden, can create a wonderful backyard habitat that will make you want to stay out all day long :)
Gardening certainly wasn't always easy for me. As a matter of fact my first three years yielded nothing more than a few lettuce leaves here or there. But I would not give up and over the years, I have come to understand what plants work best for my lifestyle and what type of garden works best.
And I've learned many tricks along the way ;) One of the most important would be the compost bin.
I used to think a compost pile/bin would be gross! Smelly, full of spoiled/rotting garbage and bugs, etc. But I've come to learn gardening and compost come hand in hand. And as it turns out, none of those fears held water - except maybe rolly polly bugs ;)
Since deciding to compost, I've had several fails. First, I tried a compost pile in one corner of the yard. My first mistake was not using the container method. The wind blew everything everywhere and it did not maintain the proper level of moisture.
After some no-go container attempts, I've since decided a giant 20" pot is best for me. I like to work in small batches of compost. Obviously if you have a very large garden, you can try the garbage tote system, etc.
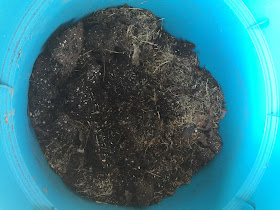
This is my bin. Wide open top for easy "stirring".
Drainage holes in the bottom of the pot are a plus.
And the existing tray in the bottom promotes air flow. Now to start your mixture ;)
My second fail when starting to compost was improper ratio of compost ingredients. This is the recipe I like to use and I think it works really well :)
First I start with a dry filler. Here is a separate bin of grass clippings that have dried out. Note I also add a trowel full of fireplace ash to my compost for PH balance. Ash is also good for acid loving plants. But remember a little goes a long way ;)
I fill the bin about a quarter of the way with dry filler. Other dry fillers could include dried fall leaves, straw/hay or bulk dried corn husks - which work great for keeping up compost during fall and winter months.
Then I throw a layer of dirt in there. This could be any dirt - I tend to use the soil left over from the previous years hanging baskets, etc. The dirt will hold water - which we'll add later.
Then add a layer of "green" filler or "wet" filler. Bulk green fillers could be fresh grass clippings or a bucket of weeds you've pulled.
In addition, I love to throw in organic kitchen waste: egg shells, coffee grounds, vegetable and fruit waste and/or peels, even animal blood!
There are also several everyday home products you can find biodegradable versions of, such as toilet paper, paper towels, feminine products - even tooth brushes. But for now I'm sticking with the basics.
Then I add another light layer of dry filler. I then will add a little water to the mix. I have a fish pond so I generally will grab a cup or so of pond water, which will be full of nitrates.
You can always mix plant food with water and add or just stick to plain water altogether.
Then mix well with a trowel or shovel and let sit to work its magic. I generally will turn the mixture once a week or so. If it has been very hot I'll add a little more water and mix more often to evenly distribute moisture.
I add a layer of compost while planting new crops in my beds as well as a thin layer to potted plants. So start gardening!
Enjoy.
xoxo
Ginger
I'm linking up to these awesome parties!


No comments:
Post a Comment