Showing posts with label Dollar Tree. Show all posts

Friday, May 12, 2017

DIY Art with Wrapping Paper

Hello.

I had a baby shower for a sweet little baby girl this weekend for a neighbor :) I love baby showers and I love baby shower gift giving! I use coupons, so I was able to score a small stock of diapers, wipes, rice cereal and stage 1 baby food for her :)

Being a mother myself, you ALWAYS NEED more of the essentials :) But its fun to get the cute stuff too.

I decided to make her some cute art for her baby nursery ;) At the Dollar Tree, I saw some gorgeous wrapping papers with lovely floral prints and I snagged several.


Excuse my terrible photo :( lighting right!

Here's what I used:


Various wrapping papers
card stock
glue stick (not pictured)
pencil
scissors
washi tape (not pictured)

I first made a heart template from the card stock. I then measured it to fit a base layer of a pretty patterned wrapping paper. Measure and cut to fit your mat.


Hmm.  Looks like my heart is a bit too big 
(I resized the heart template :)


That's better ;)


Trace and cut your heart shape onto another patterned paper.


Got a little carried away and forgot to take some pics of the next few steps. 
That creative process, ya know ;)

I added another square layer under the heart, secured with the glue stick and then bordered with a pretty peach washi tape.

I then added the flowered heart in the middle as pictured.


I felt the piece needed some bling, so I cut another smaller heart template and decided to cover in a pretty gold patterned washi tape.


I added strips as seen and let the tape over lap the shape of the heart.


Then cut off the access with the scissors.


I added the bling-y heart with the glue stick and then was ready to mat!

I secured the final piece to the back of the frame mat with masking tape.


All done! My neighbor really liked it :)


Enjoy!

xoxo
Ginger

I will be linking to these awesome parties!


Tuesday, April 18, 2017

Dollar Tree Haul!

Hello.

Well, we all know I am a big fan of the Dollar Tree...well maybe if I have one or two readers out there LOL. Are you out there??

Joking aside, I love the Dollar Tree because it provides economical ways for me to explore my mixed media tendencies and come up with more fun ways to create entries in my creative journals.

Let take a look at what I scored:


The first thing I was excited to see in the Crafts section was some decorative/craft papers pads. I tend to do a lot of collage work in my journals, so I picked up several of these.


Lovely patterns :)

I also was happy to see some stamping sets! Even an acrylic block!


I def can't wait to try these out ;)

I also found some new washi tape that you can color in yourself! It's a cool wave pattern; it will look great in my journals and perhaps new mixed media art work pieces :)


And since I am so big on creative journaling at the moment, I was excited to find these Coloring Journals. Beautiful designs and pages to write poems, thoughts, etc.


I snagged some rad neon colored gel pens too to start out some great journaling pages!


Lastly I snagged some fun patterned binder clips for my journals :)


Strips are always in style in my book ;)

Enjoy!

xoxo
Ginger

Wednesday, March 29, 2017

Build Your Own Mini Loom

Hello.

So weaving has become one of my new favorites crafts to do. It is so easy and relaxing! Just put in your ear buds and go to town :)

I decided to make my own mini loom to take with me while traveling. After all, I crochet on the plane, why not weave? It's so simple, I know you all can build one and before you know it, you'll be weaving like crazy.


Here is what you need to get started:


5 x 7 inch stretched canvas
hammer
nails
yarn
pen and scissors (not pictured)

Lets talk about the nails quickly. You will need nails with a flat head. Finishing nails are not a good idea. At least 1 inch long is preferred.


Turn your canvas over and you'll see how it is stretched and stapled in the back. 


Start by ripping the canvas off the canvas frame. You could use a flat head screw driver or pliers to take the staples out but it's pretty easy to just rip it.


Then you are left with a perfect wooden frame. You could build your own frame for custom or large scale looms, but this works great for now ;)


Then, using your ruler, measure 1/4 inch from the inside of the frame. Make a mark using the pen.


From that 1/4 inch pen mark, then mark every 1/2 inches.


From each pen mark, draw a line down at 1/4 length.


Then, starting from the end line, measure 1/4 inch in and mark with the pen. You'll then mark every 1/2 inch as before and draw a 1/4 length line as before.

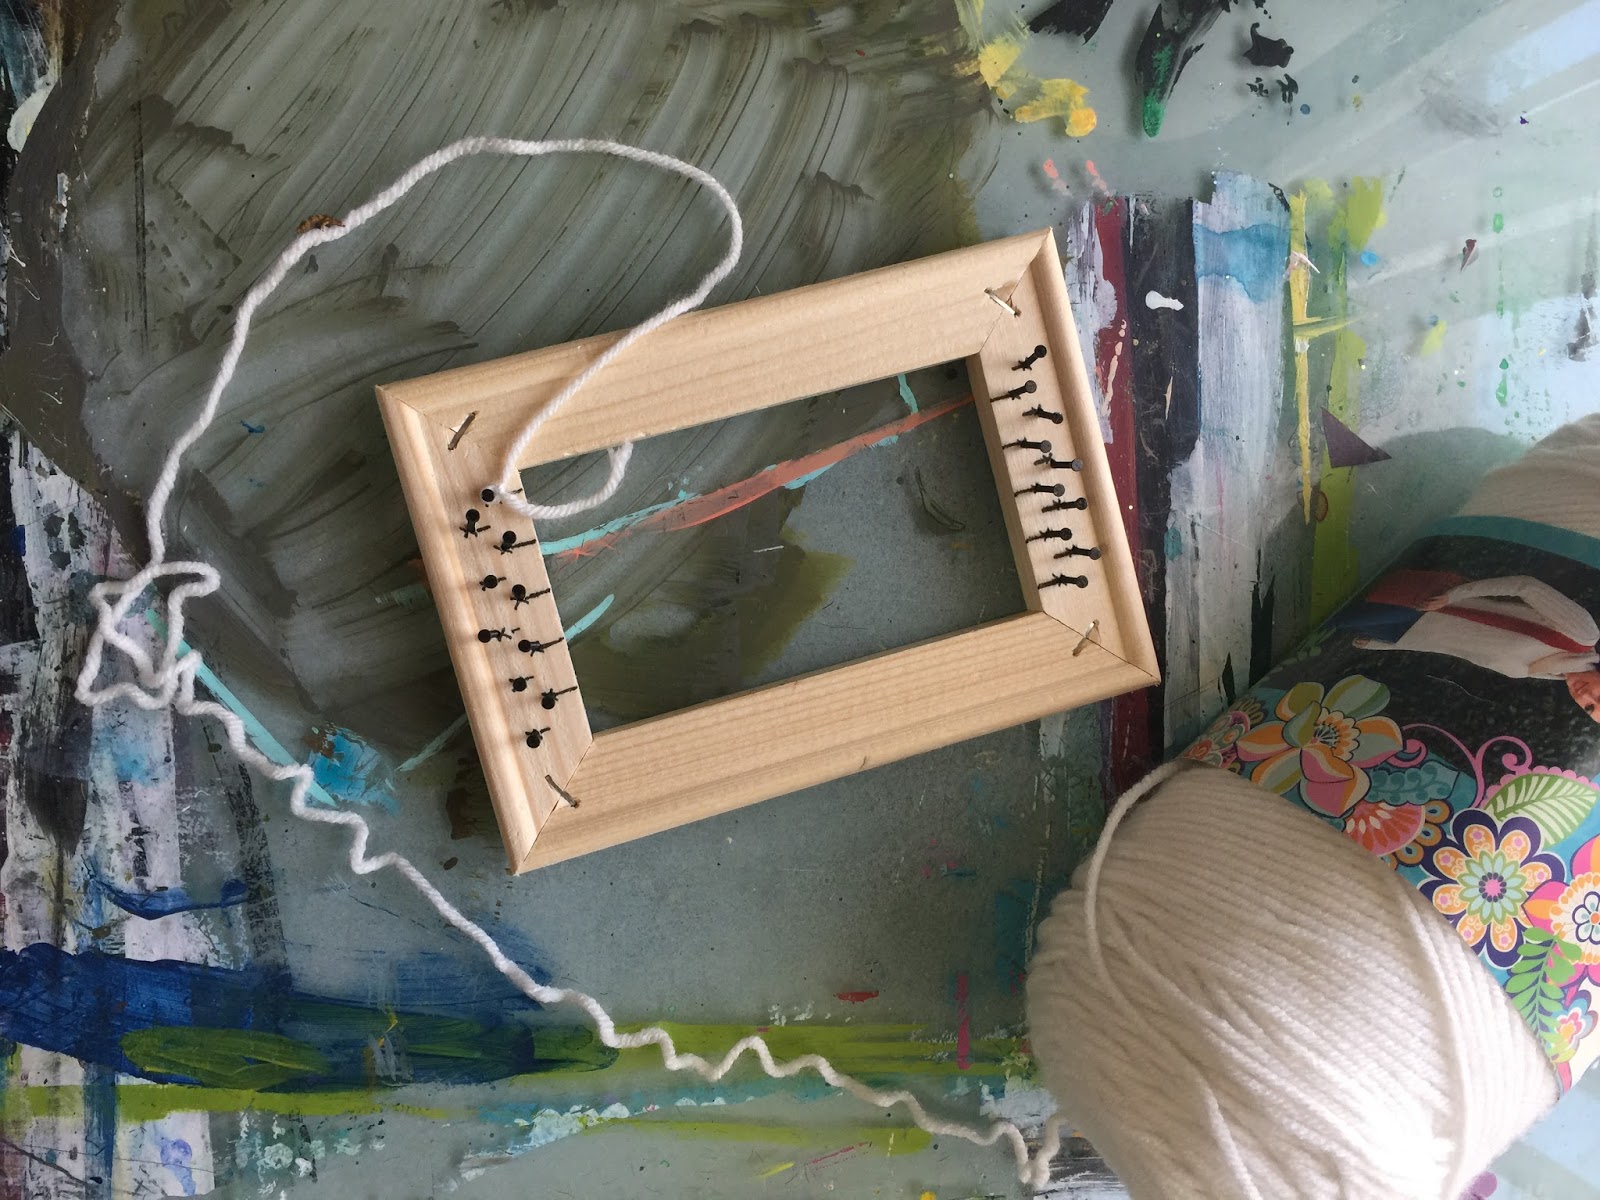
You will now have warp points staggered at every quarter inch. I like to mark the ends of the lines with X's as that is where we will hammer the nails in.


Like this. The nails do not have to be straight or perfect; you mainly want the point of the nail dead on your X for an evenly space warp thread.


We'll then start warping the loom. Tie the yarn at one end nail in a tight double knot. I just used plain white yarn here as the warp threads don't show very much.


Then begin warping the loom going in an "over and under" fashion. Remember, you don't want them super tight - just tight enough to bounce back when you press down on the warp threads.


When you get to the end nail, carefully make a tight double knot. 
You can trim the long tail if you want.


Now you are ready to weave! I even found some mini dowels at the Dollar Tree that will fit this loom perfectly :) All you need now is some pretty yarn and a yarn needle.


Feel free to check out my DIY post of weaving here that includes an online class on beginner weaving. 

Enjoy!

xoxo
Ginger

I will be linking up to these awesome parties!

Tuesday, March 28, 2017

Repurposed Coffee Carafe into Terrarium

Hello.

So I know I've been coo coo for terrarium's lately as you remember from here and here. There are so sweet and cute! Plus there is potential to re-purpose items, like here :)


I've had this vintage carafe for a couple of years now. It's been on the back porch and has served many purposes, such as watering can to measuring device to even a seashell display.

It is now being re-purposed again for...you guessed it...a terrarium.

Here's what you need:


vintage carafe
natural decor rocks
moss rocks
Spanish moss
few floral sprigs
faux succulent

As you can probably guess, all of these items were purchased at the Dollar Tree. The carafe was a thrift store purchase.

In the end, I decided on a design that included only the decor rock, moss rock and succulent. But you can play with this and come up with so many designs.

First, I filled the bottom with an even layer of the natural decor rocks.


I then nestled a few moss rocks into the decor rock. Lastly, I added the succulent.


Very simple but turned out lovely :)


I soon hope to be adding a sweet bench and side table on my front porch. I hope to set this little terrarium out as well to pair nicely with my succulent wreath.

Enjoy!

xoxo
Ginger

I will be linking up to these awesome parties!

Monday, March 13, 2017

Adorable Succulent Wreath

Hello.

After being inspired by the sweet succulent stems at the Dollar Tree, I had a lot of fun making faux succulent arrangements here and here.

And with so many beautiful wreaths I'm seeing, I decided to make one myself.


Isn't it pretty? Very simple and easy to do. Everything was purchased at The Dollar Tree. This project costs me only $6 :)


Enjoy.

xoxo
Ginger

I will be linking to these awesome parties!
Related Posts with Thumbnails