Showing posts with label gardening. Show all posts

Friday, May 19, 2017

Chimney Cap Planter

Hello.

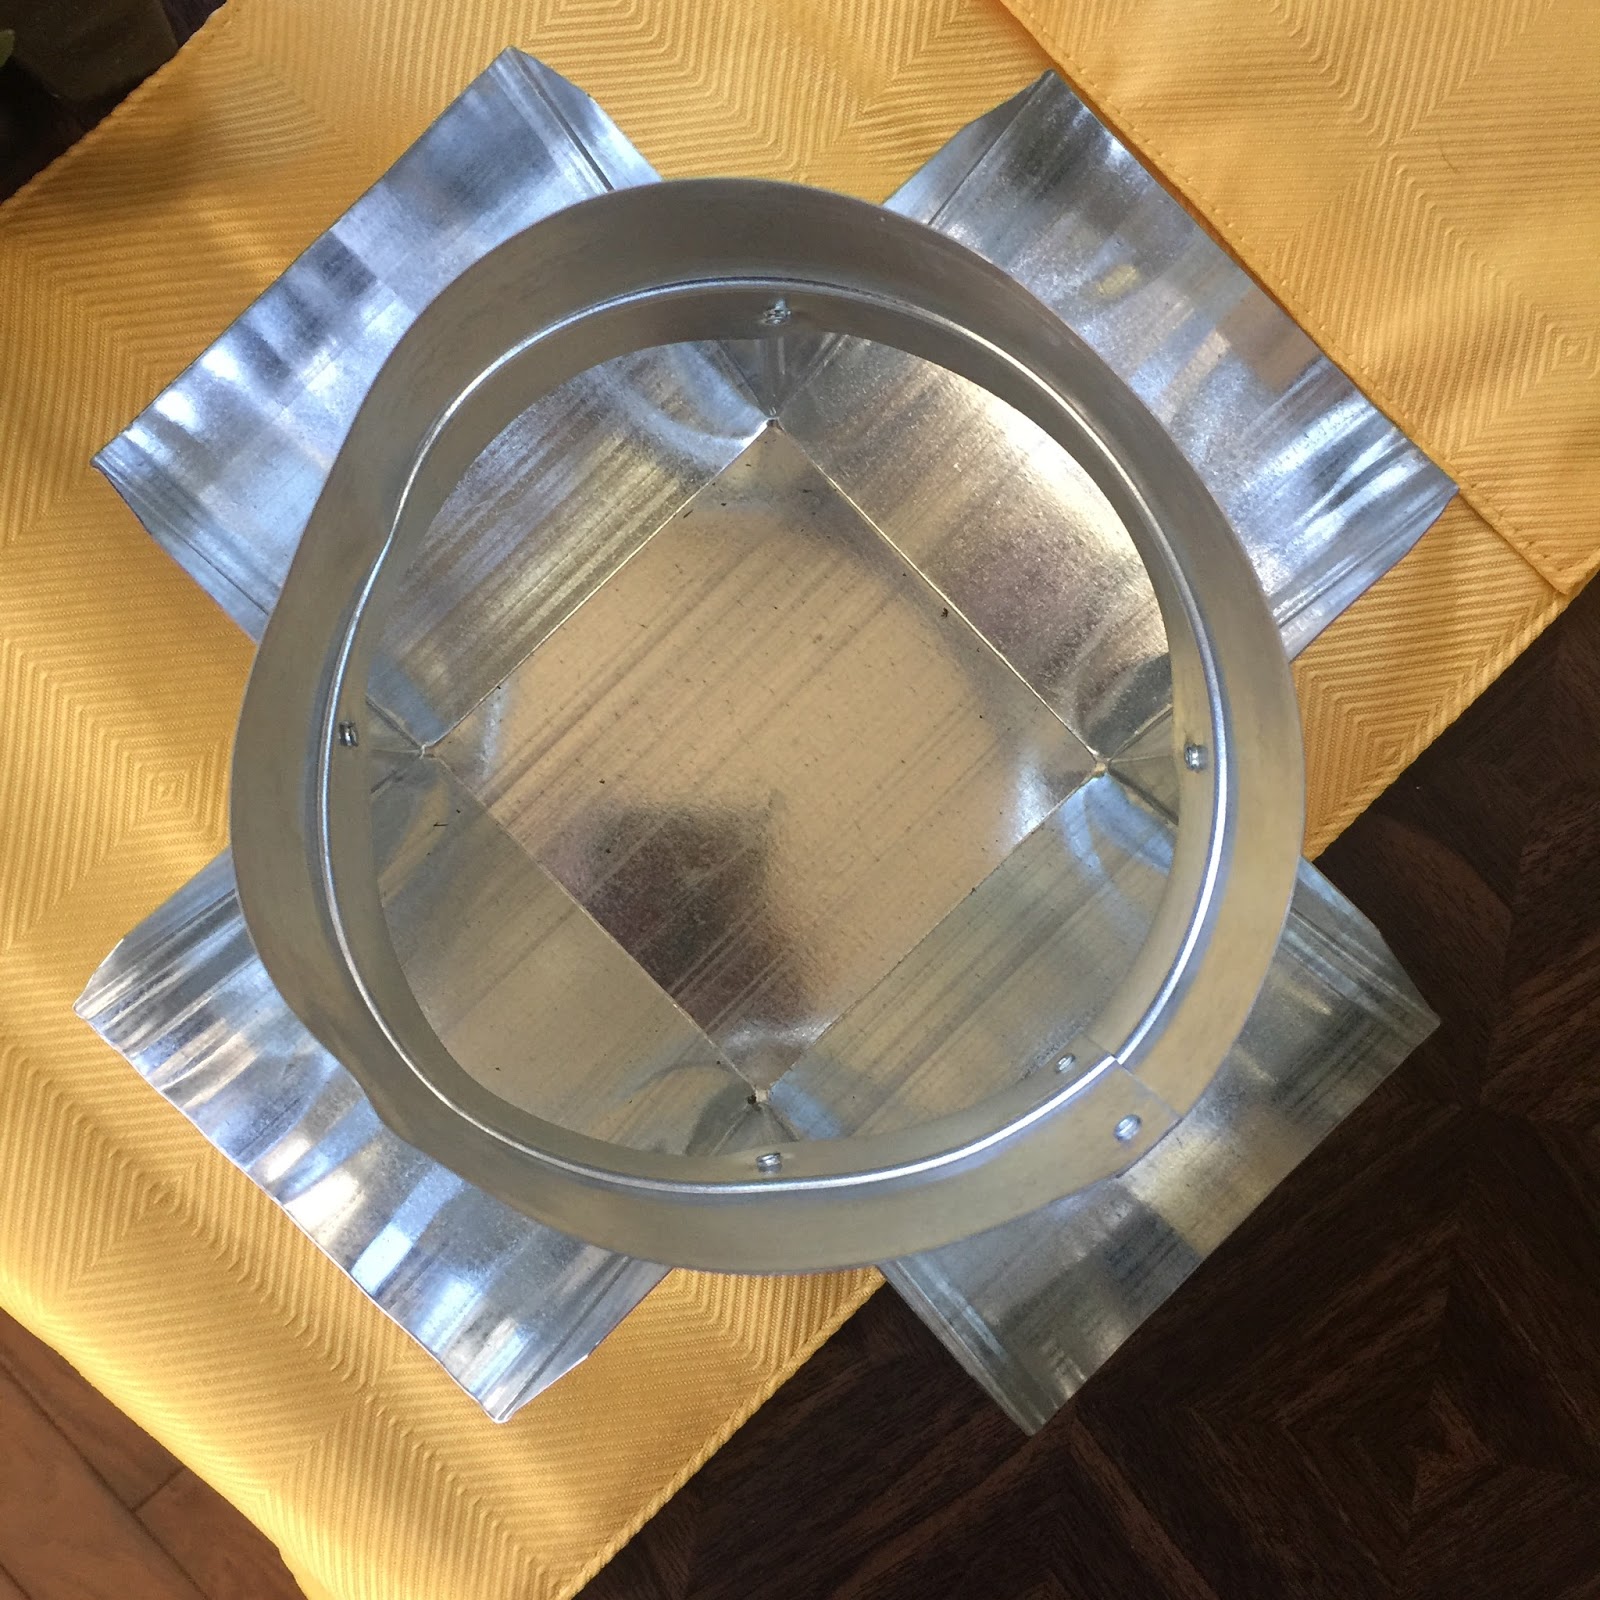
So I have thinking about this idea for literally about 10 years. After seeing this in Home Depot, I thought, " that would make a cute planter..?" And guess what? It totally makes CUTE planter!


So pretty!


This is an aluminum chimney cap I snagged at Home Depot for about $10. I then picked up two 6-packs of pink, shade-loving impatiens and voila'!


Add some potting soil to the cap. The little 6 pack flowers fit perfectly side by side in the slanted aides of the cap.


I covered exposed roots with a little more soil.


Then water and done ;) 


Next day, the flower stems on the sides straightened up and it looks really cute :)

Enjoy!

xoxo
Ginger

I will be linking up to these awesome parties!

Wednesday, May 17, 2017

Quick DIY Succulent Mother's Gift

Hello.

For my sweet mother in law (who is one of the sweetest people I have ever met - I am truly fortunate) I wanted an especially sweet Mother's Day gift.

I had found this super cute rooster coffee mug from a local thrift store that perfectly with her decor, a few months ago, and I had planned on making a candle for her - but alas, I could not find my candles making supplies!!! What? Yeah, I must be that dis-organized...

Oh well...

I decided on succulent instead :) A good friend of mine has been creating some super cute arrangements lately and I figured....PERFECT!

I snagged an beautiful aloe plant from Walmart for about $5 and score....perfect for the mug I had on hand. No soil required ;) How about that??


This was really THE perfect fit :) It will go great with her kitchen decor and she loves to garden ;)


I added a sweet little bow and hand made card using my new packing image transfer technique :)


She loved it and I was more than proud to present her with this gift. She provided me with a beautiful man and father for my children :)  She s worth so much more!

Enjoy!

xoxo
Ginger

I will be linking to these awesome linky parties!


Wednesday, April 12, 2017

Perennials That Thrive in North Texas

Hello.

For those that garden in the same neck of the woods as I do, I thought I'd share which perennials do really well for me :)

Perennials are plants that stay dormant during winter months and will come back in the following spring.

I love perennials for one main reason - you buy them only once! They come back the next year and some come back every spring for years to come :) What's not to love? Flowers that live on and on and spending the money once? That is what I call double duty :)

I have a pretty active vegetable garden at the moment and, while I am certainly no expert to gardening, I have several species of flower that has come back year after year with no complaint :) And this gives me a well deserved boost! LOL

Here are a few from my personal garden that are hardy for this region of Texas:

One of my personal favorites is Creeping Jew (as I have always known it) - also known as Wandering Jew. Such a vibrant purple, very hardy and it can be cut, rooted in a jar of water and then planted else where. A great addition to any North Texas garden - hands down.


The beautiful and tropical Hibiscus flower :) Other than trimming the dead branches back each fall, my hibiscus come back vibrant as ever each spring.


This is a basic lavender that I bought from Home Depot (not sure of the species exactly) but it has returned for the past two years, very full and very vibrant. It draws both butterflies and bees for pollination so very good for the environment and your backyard habitat. 

It also comes back in the most horrid soil possible - the area in which I originally planted it is hard clay (I didn't realize it at the time) and it prevails each spring :)


And of course, any rose bush. They are beautiful. They are hardy. I mean come on... It's a ROSE! A classic to any garden.


Lastly, but certainly not least as I am sure there are many more perennials out there for North Texans, would be strawberries. They do indeed come back every spring for several years. They have beautiful ground cover and blossoms, not to mention the fruit :) It's a win/win all around!


I hope this may be helpful and will also curb your attentions past the basic petunias and other annuals! They are certainly beautiful, economical and worthy of their place in your garden, but perennials prove their worth for several years!

Enjoy!

xoxo
Ging

I will be linking to these awesome parties!

Friday, March 24, 2017

DIY Compost Bin

Hello.

Just let me say, I love gardening! Not only is it a great pastime and stress re-leaver, but there are so many environmental and health benefits as well. It is so satisfying watching things grow and having the security of growing my own food. In addition, a great garden, whether it is a vegetable/fruit or flower garden, can create a wonderful backyard habitat that will make you want to stay out all day long :)

Gardening certainly wasn't always easy for me. As a matter of fact my first three years yielded nothing more than a few lettuce leaves here or there. But I would not give up and over the years, I have come to understand what plants work best for my lifestyle and what type of garden works best.

And I've learned many tricks along the way ;) One of the most important would be the compost bin. 


I used to think a compost pile/bin would be  gross! Smelly, full of spoiled/rotting garbage and bugs, etc. But I've come to learn gardening and compost come hand in hand. And as it turns out, none of those fears held water - except maybe rolly polly bugs ;)

Since deciding to compost, I've had several fails. First, I tried a compost pile in one corner of the yard. My first mistake was not using the container method. The wind blew everything everywhere and it did not maintain the proper level of moisture. 

After some no-go container attempts, I've since decided a giant 20" pot is best for me. I like to work in small batches of compost. Obviously if you have a very large garden, you can try the garbage tote system, etc. 


This is my bin. Wide open top for easy "stirring".


Drainage holes in the bottom of the pot are a plus.


And the existing tray in the bottom promotes air flow. Now to start your mixture ;) 

My second fail when starting to compost was improper ratio of compost ingredients. This is the recipe I like to use and I think it works really well :)

First I start with a dry filler. Here is a separate bin of grass clippings that have dried out. Note I also add a trowel full of fireplace ash to my compost for PH balance. Ash is also good for acid loving plants. But remember a little goes a long way ;)


I fill the bin about a quarter of the way with dry filler. Other dry fillers could include dried fall leaves, straw/hay or bulk dried corn husks - which work great for keeping up compost during fall and winter months.


Then I throw a layer of dirt in there. This could be any dirt - I tend to use the soil left over from the previous years hanging baskets, etc. The dirt will hold water - which we'll add later.


Then add a layer of "green" filler or "wet" filler. Bulk green fillers could be fresh grass clippings or a bucket of weeds you've pulled. 

In addition, I love to throw in organic kitchen waste: egg shells, coffee grounds, vegetable and fruit waste and/or peels, even animal blood!

There are also several everyday home products you can find biodegradable versions of, such as toilet paper, paper towels, feminine products - even tooth brushes. But for now I'm sticking with the basics.


Then I add another light layer of dry filler. I then will add a little water to the mix. I have a fish pond so I generally will grab a cup or so of pond water, which will be full of nitrates.

You can always mix plant food with water and add or just stick to plain water altogether. 


Then mix well with a trowel or shovel and let sit to work its magic. I generally will turn the mixture once a week or so. If it has been very hot I'll add a little more water and mix more often to evenly distribute moisture. 

I add a layer of compost while planting new crops in my beds as well as a thin layer to potted plants. So start gardening!

Enjoy.

xoxo
Ginger

I'm linking up to these awesome parties!

Wednesday, March 22, 2017

My Vegetable Garden

Hello.

So I wanted to give a little tour of my vegetable garden :) I love gardening and have worked pretty hard the last few years to get it right! Gardening isn't always so cut and dry -_-

Sadly, I've had several epic fails, but after a lot of research and experimenting, I know what works best for my lifestyle and the types of plants I want to grow :) Let's check it out!


Here is my main garden. I love raised beds. Practically fool proof ;) 

And super easy to construct. The wood plank I snagged from the remnant pile at Home Depot for 75% off. I had a few 2 x 4 pieces at home from another project. Add a few screws and done. I added four tall posts on each corner so I could cover the garden with plastic if needed.

In the raised bed, I have cauliflower, cabbage, hot pepper plants, three types of lettuce (butter crisp, romaine, and red leafy) onions and carrots.

I also have quite a bit in large containers. I prefer to put "bushy" type plants in containers, like tomato, green beans and sweet potato.


You can see here my first few little babies coming in!

I also wanted to try some berries this year so here are my blueberry and black berry bushes.


My brother in law built this large wooden planter and I have some spinach starting up here. 


In smaller pots, I have some bell peppers and strawberries :)


I did several vegetable plants from seeds this year; spinach, arugula, carrots and green beans. But everything else, I just went for young plants. Cuts down on the waiting!


My lettuces are looking gorgeous!


It's so amazing to plant, water and nurture your own food! I'm very excited to harvest this year :)

Enjoy!

xoxo
Ginger

I'm linking up to these awesome parties!


Related Posts with Thumbnails